If your computer takes too long to boot, then you should consider migrating your Windows 10 OS to a solid-state drive (SSD). SSD drives have become more affordable today, which is why you should get one for your computer. In this post, you will learn how to move Windows 10 to SSD.
There are a few ways to transfer data from your current hard disk drive to a new SSD, and you will learn about them in this guide.
The simplest method would be to perform a clean install on the SSD. However, you risk losing your data. You will also have to reinstall programs all over again.
There is no big difference between installing Windows 10 on an SSD drive and a hard disk drive. You have to format your hard disk drive. Then install Windows 10 on the SSD drive.
But you can still move an already installed Windows 10 to the SSD drive without having to perform a clean install. To do this, you need to clone the system drive. But that’s not all.
It requires some effort on your part to ensure that you do the installation correctly. In the next part of the article, you will find the steps you need to follow to ensure a smooth transfer of the system to the SSD drive.
But first, you have to back up your files so that you don’t lose them if something happens.
Read on for simple methods on how to move Windows 10 to SSD.
Quick Overlook
How to move Windows 10 to SSD
Before moving Windows 10 to SSD, it is vital to clean out Windows to make the move as smooth as possible. The good news is that Windows has its own cleanup tool you can use.
Use the search tool on your Windows OS to find the Disk Cleanup tool. When you open the tool, you will find all the files you may want to delete. But make sure you double check the different options to see if there is something you would like to keep.
Here are the steps on how to move Windows 10 to SSD:
- Back up your data
- Shrink your hard disk drive volume
- Copy Windows 10 to SSD
- Format the contents on HDD
After backing up your drive, the next step is to get rid of the extra hard disk space because SSD drives don’t have as much space as regular hard disks.
Remember, the goal is to get your partition to fit on an SSD drive. So delete your photos, videos, music, and other personal files to ensure your partition is small.
You can recover your personal files from the backup when the process is complete, so don’t worry.
The simplest way to migrate a system partition to an SSD drive is to use AOMEI Backupper Standard and EaseUS Todo Backup. You simply need to download the software. You should also defrag your hard drive before taking the next step.
Continue reading to find simple methods to move Windows 10 to SSD.
Method 1: Using AOMEI Backupper Standard
You must think moving Windows 10 to SSD is a complicated job. Well, it is. But with reliable software like AOMEI Backupper Standard, everything about the migration is not annoying and disturbing.
Here are the simple steps on how to move Windows 10 to SSD using AOMEOI Backupper Standard:
Step 1: Download AOMEI Blackupper Standard
Step 2: Install the software
Step 3: Connect the hard drive to your computer. There is a wide range of options when it comes to hard drives, but SATA is the most common. SATA cables are usually flat, red in color, and connectors are L-shaped at one end.
Plug the new drive into a free slot on your computer’s motherboard and connect a spare cable from your power supply unit.
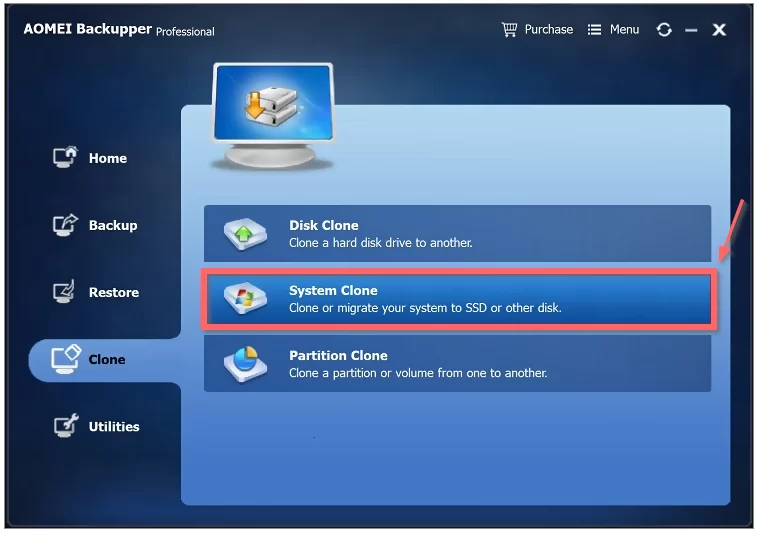
Step 4: Hit Clone, and then System Clone to start the process.
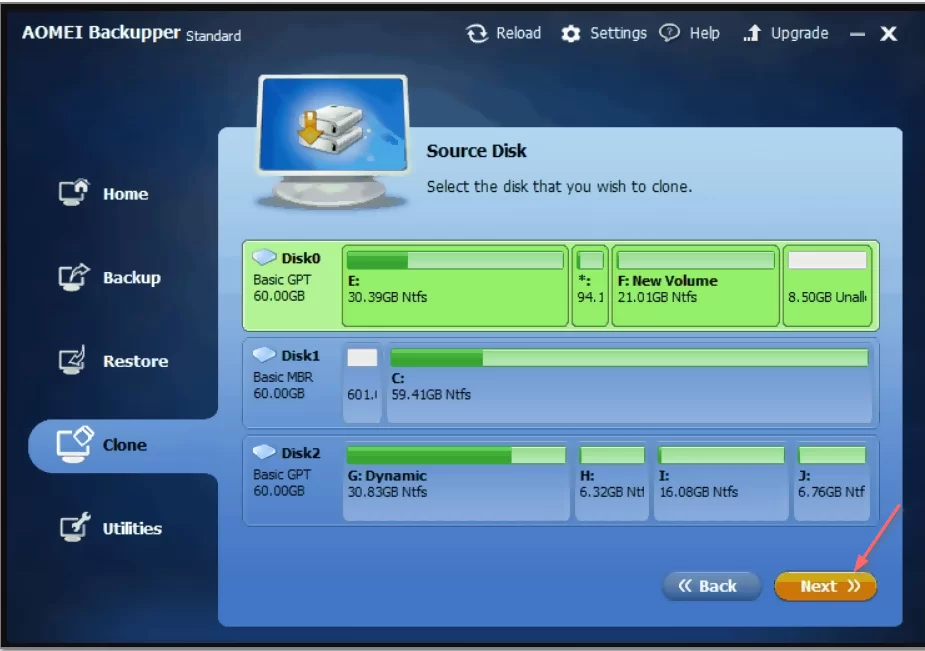
Step 5: The software will detect and display all hard drives in Windows 10. Select the hard disk drive where the operating system is and click next.
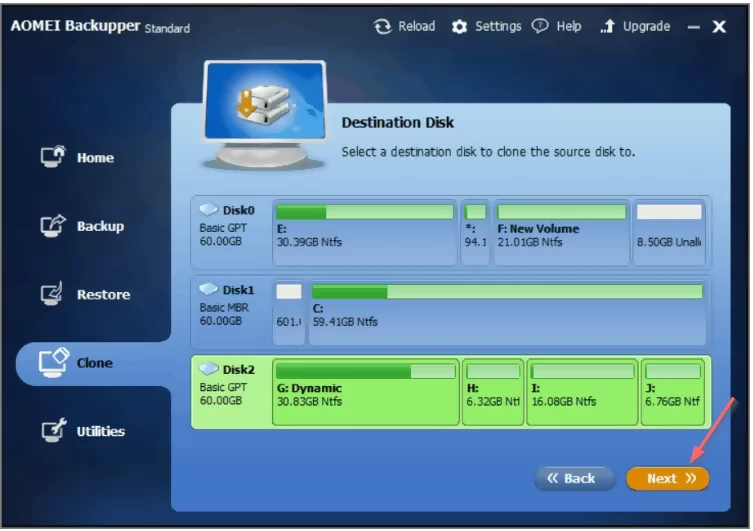
Step 6: Select the location where you want to move the data. In this case, choose SSD drive and click next.
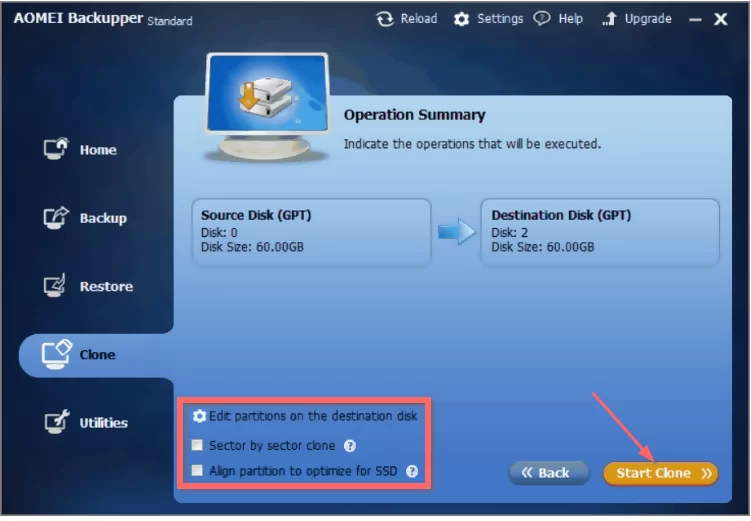
Step 7: Click Start when you see the window below.
Method 2: Using Easeus Todo Backup
Easeus Todo Backup is one of the best system-back disk clone programs. It allows you to clone and migrate Windows 10 to SSD without losing data.
Here are the simple steps on how to move Windows 10 to SSD using Easeaus Todo Backup:
Step 1: Connect your new hard drive to your computer.
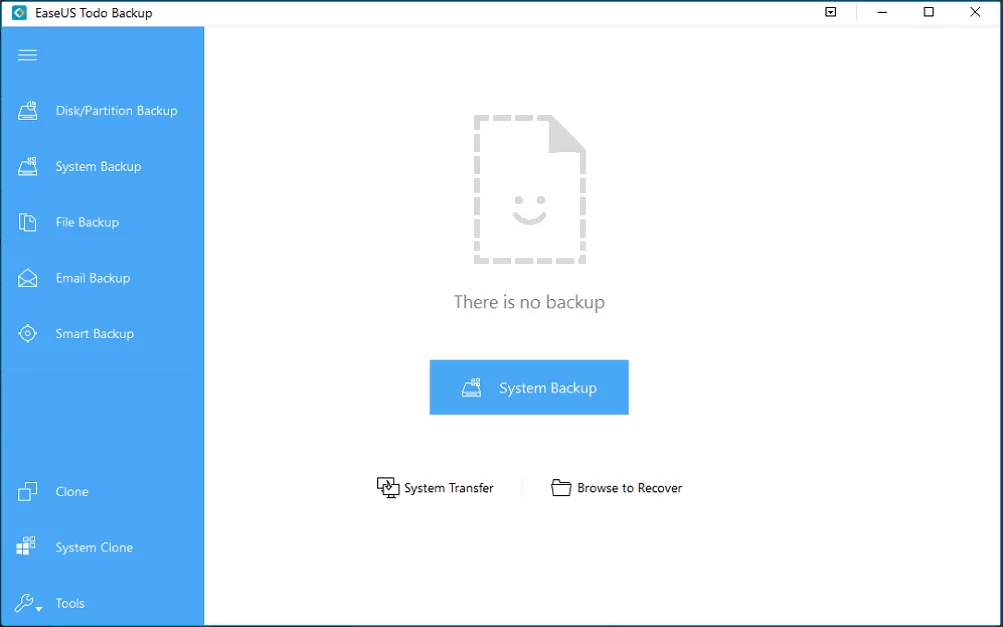
Step 2: Open Easeus Todo Backup. Click the icon in the top-left corner of the panel to select System Clone.
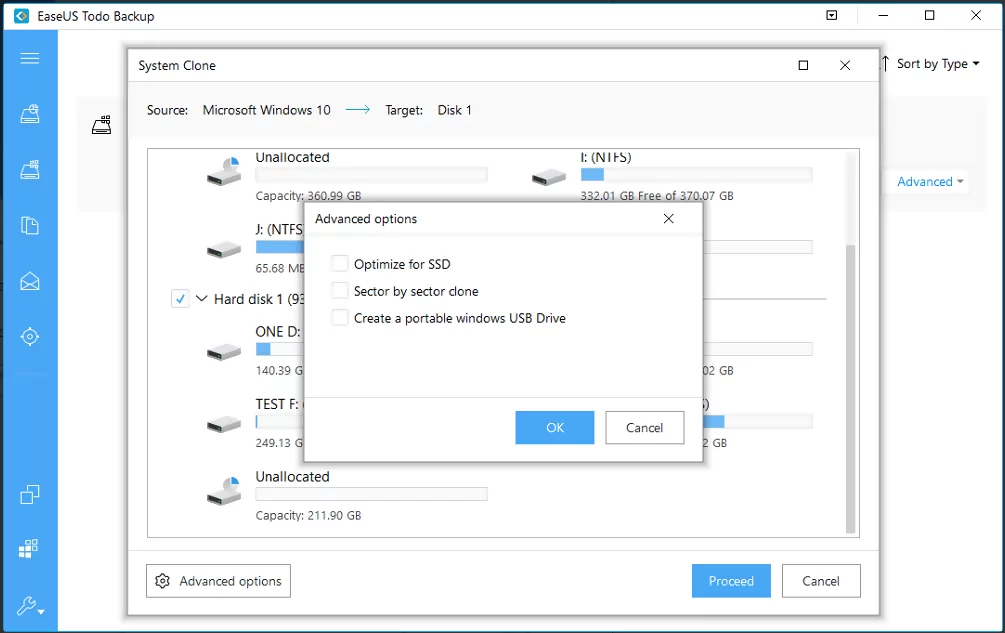
Step 3: Choose SSD as your destination drive to save your cloned Windows 10 OS.
Step 4: Click proceed to start cloning your Windows 10 to SSD.
Then insert the new hard drive into your PC and restart it. Boot your PC from the hard drive with the clone operating system. Here are the steps to follow to do this:
- Restart your computer and press the F2 or F8 key on your keyboard to access the BIOS settings
- Select your SSD as your new boot drive and save changes
- Exit BIOS and reboot your PC
If the move takes place without any errors, your Windows 10 will move to SSD. The only error you are likely to encounter is one that informs you your hard drive is too big.
In this case, you simply need to delete more personal files from your drive.
After learning how to move Windows 10 to SSD, The next step is to wipe the contents of the HDD.
Read on to find out how…
How to get rid of HDD partition with its content
Here are the simple steps you need to follow to get rid of the contents on your first drive:
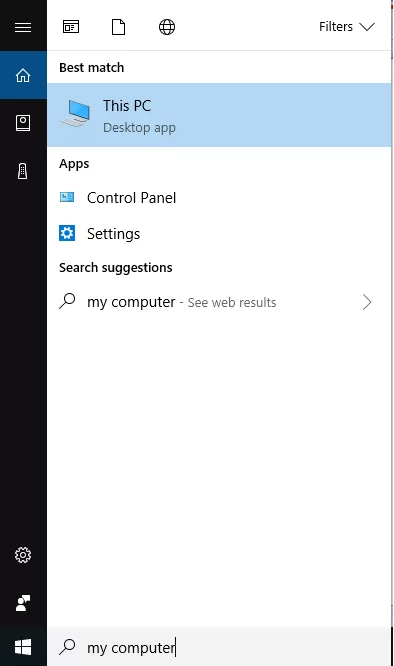
Step 1: Find My Computer
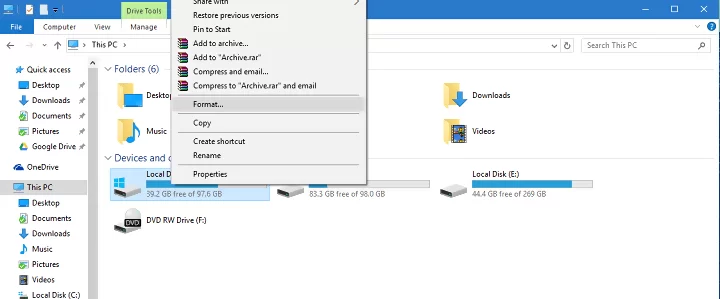
Step 2: Go to your system drive
Step 3: Right-click on it to proceed and select format
That’s all you need to do to move Windows to an SSD drive. Your computer will now perform faster than when it was using HDD.
But you’ve got one more step to complete restoring the personal data and files you backed up when you were starting this process. Read on to find out how…
Restore Your Personal Data to the Old HDD Drive
As mentioned above, your SSD drive may not be as large as your HDD. So, you have to restore your personal files to your old hard disk drive. Here are the simple steps you need to follow to move your personal files smoothly:
- Find the old hard disk drive (it should now be empty)
- Create and name a new folder where you will store your personal files
- Go to C:Users to find your folders there
- Right-click on each folder, select Properties, and go to the Location tab
- Click Move and choose the new folder you’ve created as the target folder
- All user folders, including Desktop, Documents, Downloads, Music, Pictures, and others should go to your hard disk drive
The next step is to restore your personal files. Here are the steps you have to follow:
Step 1: Go to your back up. That could be an external storage hard drive, a cloud, another partition, or any other backup you choose.
Step 2: Drag your files to their respective folders. For instance, documents should go to My Documents, music to My Music, and so on.
This will allow you to access all your personal files, even though their location is not on the system partition. However, you should consider changing the settings of the apps and games you use more often as they might save files in the previous My Documents.
Conclusion
That’s all you need to know with regards to how to move Windows 10 to SSD. Hopefully, you have found this post useful.
If you have followed the steps in this post and moved Windows 10 to SSD, let us know what you think. Leave a comment below.

